Tuesday, July 3, 2018

Oatmeal Raisin Muffins #dairyfree

For our summer curriculum project we're always tasked with bringing in something to eat so we can all snack while working.  I wanted to make something I could eat, but that was also not sugar heavy so I found these Oatmeal Raisin Muffins from The Kitchen Magpie and adapted them to be both dairy-free and nut-free (meaning no nut-milks!).  I also doubled the recipe so that we had some extra for home. 


4 eggs
1-1/3 cup brown sugar
1 cup vegetable oil
1 cup vegan buttermilk (1 Tbsp vinegar, fill to 1 cup with soy milk, mix and let stand 5 minutes)
3 cups flour
2 cup rolled oats
2 tsp baking powder
1 tsp baking soda
2/3 tsp salt
1 cup of raisins 

Preheat the oven to 400º and then make your vegan buttermilk - I used soy milk because a) there was also someone with a nut allergy in the group, and b) it's thicker than other DF milks.  Grease your muffin pans well (unless you're using paper muffin cups, but why waste those when greasing well works).  In a large bowl, whisk the eggs, brown sugar, oil and vegan buttermilk together.  Add in the flower, oats, baking power, baking soda and salt and mix well.  Mix in the raisins.  Divide the batter evenly between the muffin pans, using a 1/3 cup scoop worked well for this, then bake for about 20 minutes (less time if you didn't double it).  Slide a knife around the edges to help loosen them, then cool on wire racks and enjoy!


Yum!

They even save well in the freezer, just pop into the microwave for 30 seconds, dab on some Earth Balance butter and enjoy!

Dairy-free Lemon Bars with Raspberry Sauce #dairyfree


Image result for The Best Recipe

We've started a Dinner Club with some friends and for our last dinner party in June we made some Lemon Bars with Raspberry Sauce to help start the summer!

I found I have the Cook's Illustrated Best Recipe Cookbook and am really enjoying it because they discuss all the trials they went through to get the best recipe they can.  Perfect for Foodie Nerds!  Luckily they had a lemon bar recipe in there so we started with that as our base and then just had to adapt it to be Dairy Free for me. 

Start by making the crust - for a 13x9 pan I had to make a bit extra, but I also like a thicker bottom than the 1/4 inch thick they suggested.  Using the food processor here makes it so easy!  

Prep your pan - grease it, then lay a strip of parchment paper so it goes up the two sides, then dot it with butter and lay a second strip the opposite way so the other two empty sides get covered too.  (We messed this up... it still works, you just want to make sure things don't stick to the pan.)

Image result for 13x9 parchment paper cover
Source

1.5x recipe
2.62 cups all-purpose flour (2-1/2 cup plus 2 tablespoons)
1 cup powdered sugar
3/8 cup cornstarch
1 tsp salt
18 tablespoons Earth Balance vegan butter

Pulse the dry ingredients a few times, then add the vegan butter and quickly blend (10 seconds) then pulse until it's all pale yellow and looks like coarse cornmeal.  Sprinkle into the pan and press the bottom to your desired thickness and then up the sides about a half inch.  Refrigerate for 30 minutes, preheat the oven to 350º halfway through that (or however long your oven takes to preheat), then bake for 20 minutes until golden brown.  Because mine was thicker, it took longer to bake, about 35 minutes.  While it's baking, make the filling.

6 large eggs, beaten
2 cups sugar
4.5 Tablespoons all-purpose flour (a 1.5 T measuring spoon is great here!)
3 rounded teaspoons lemon zest
1 cup lemon juice (took 5 lemons)
2/3 cup soy milk
1/4 tsp salt

Whisk eggs, sugar and flour together, then stir in lemon zest, juice, milk and salt and blend well.   Pour into the warm crust, reset the oven to 325º and then bake for about 20 minutes until it feels firm on top.  Cool on the counter and then lift out with the parchment paper and slice.


We had extra filling so I poured it into a bread pan - wrong container.  It took forever to bake, the bars with the crust ended up taking about 30 minutes, then it took an extra 15 for the bread pan.  Should have used a 9x9 so that it would be a similar depth to the 13x9 pan.


For a topping, we sprinkled it with some extra powdered sugar (which melted by the time we arrived, whoops!), scattered some fresh raspberries, and made a raspberry sauce from The Gunny Sack.  

1/4 cup water
1.5 containers of fresh raspberries
1/3 cup sugar
1 tbsp freshly squeezed lemon juice
2 tbsp cold water
2 tbsp cornstarch
1/2 tsp vanilla
dash of salt

Put everything minus the vanilla and salt into a small sauce pan, cook over medium heat for about 5-7 minutes and stir occasionally so the raspberries start to break down.  It was a bit thicker than I wanted so next time I would skip the cornstarch, but if you wanted to add it you would mix the cornstarch and cold water together, then pour in and continue to cook until it's thickened.  Once finished, remove from heat and stir in the vanilla and salt.   Allow it to cool a bit, then put in a container for transport or storage.

These were delicious, and the leftover curd was a delightful addition.
Enjoy!

DF Chocolate Birthday Cake

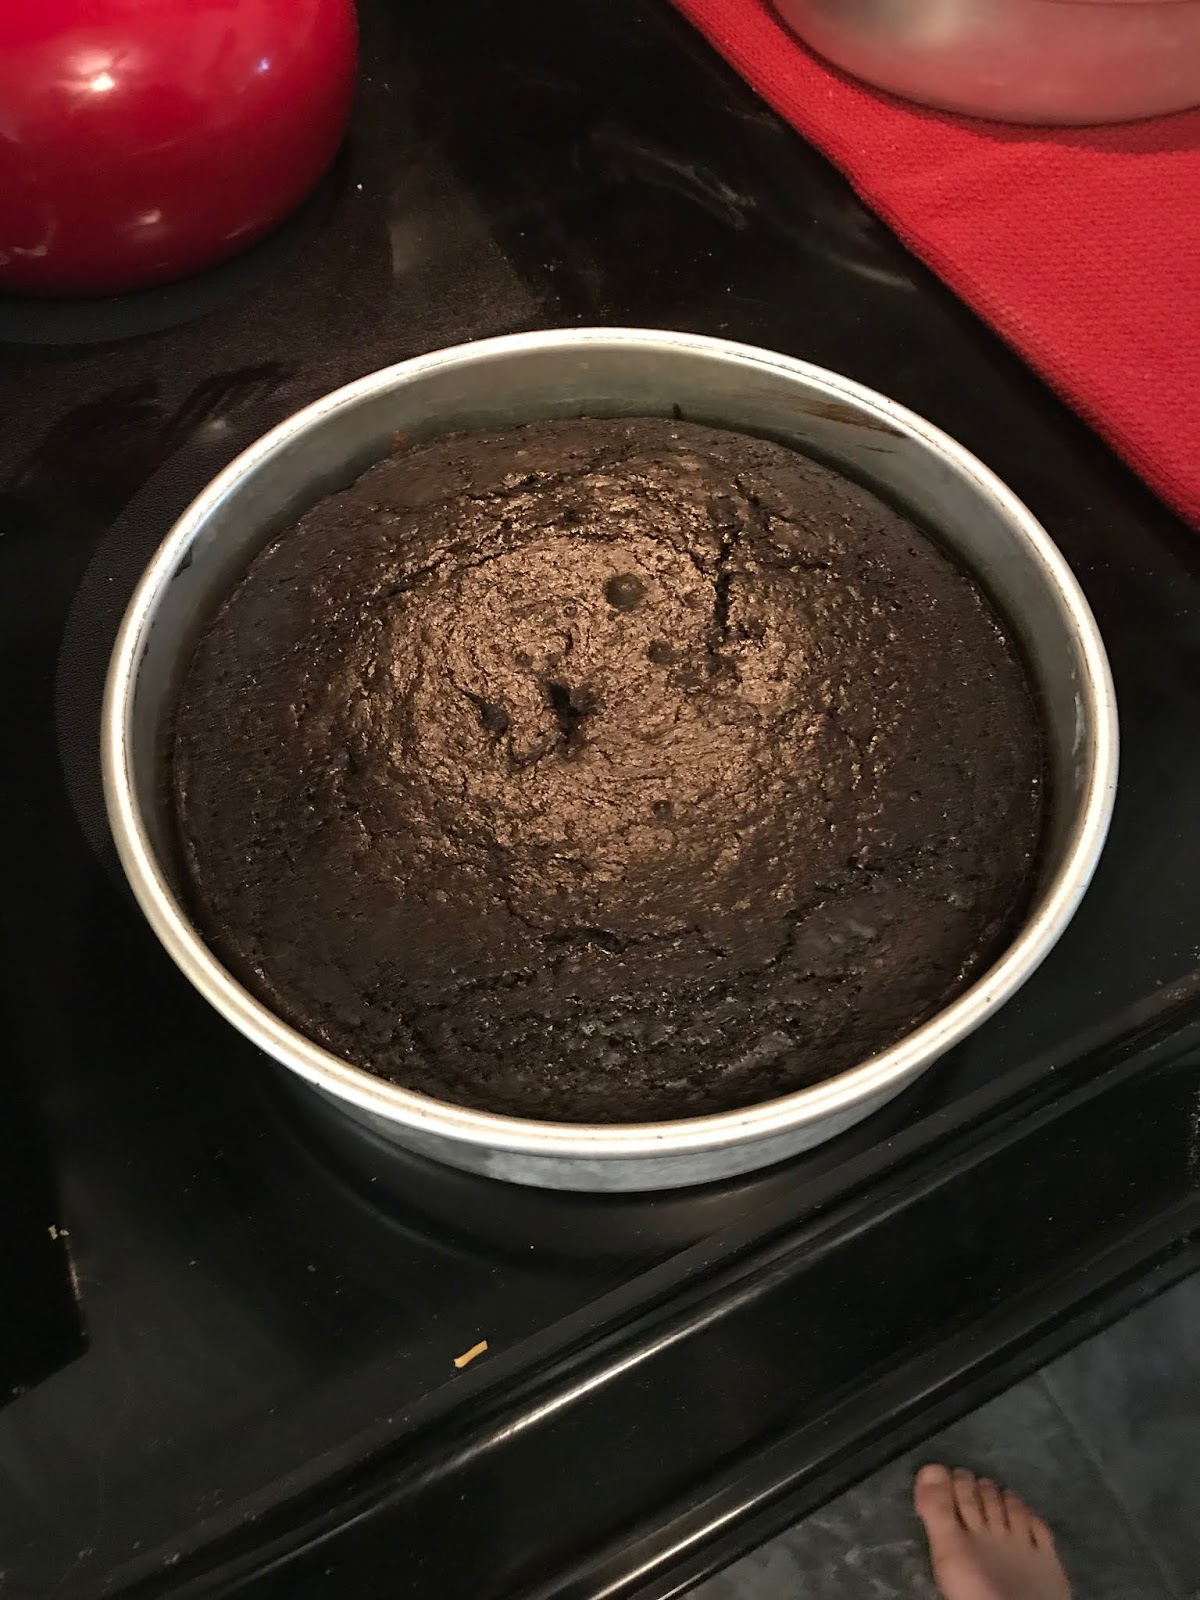
We went to Ohio this weekend to visit my in-laws for my MIL's birthday and did a ton of yard work on Saturday and then made cookies and a birthday cake on Sunday.  My MIL requested a chocolate cake with raspberry so I found the "i want chocolate cake" cake from Smitten Kitchen and decided to make it dairy free so I could enjoy it too.  She's the baking queen (her cookies are amazing) so I'm sure it was hard for her to give up her kitchen to the kids for a time.

We made the cake first, doubling the recipe to make two 8 inch rounds:

12 tablespoons of Earth Balance vegan "butter"
1-1/2 cups packed dark brown sugar
4 Tablespoons regular sugar
2 eggs
2 egg yolks
1-1/2 cup vegan buttermilk 
2 tsp vanilla extract
1 cup Extra dark Hershey's cocoa (couldn't find Dutch cocoa in small town Ohio)
2 cups all-purpose flour
1/2 tsp baking soda
1 tsp baking powder
1 tsp salt

Set the over to 350º.  Put parchment paper in the bottom of the cake pans, then grease them.  Make the vegan buttermilk first so it has time to sit, then cream the "butter" and sugars well in a mixer until they're fluffy.  I learned that with Earth Balance you have to extra cream it to make sure it doesn't start to separate on you.  Then add in the eggs, buttermilk and vanilla and mix.  Sift all of the dry ingredients onto a large piece of wax paper, then put the mixer on slow and slowly pour the dry ingredients in, pausing a couple times.  Then pour the batter into the cake pans and bake.  With two pans, it took about 45 minutes to fully bake.  These pulled away from the edges of the pan nicely and were really easy to flip out onto a cooling rack. 


Allow the cake layers to cool completely before frosting - so important!  Once cooled, I sliced the rounded top off the bottom layer so they would stack easily, then used raspberry jam to coat the top of the bottom layer and put the top layer on top.  

Frosting time!
We made the frosting a little early and being a hot summer day, it took the layers a bit longer to cool so the frosting was thicker than I wanted to spread it.  Next time I would start the frosting once the layers are completely cooled and we're ready to put the cake together.

4 oz dark DF chocolate (we used 90% Lindt), melted and cooled
3 cups powdered sugar
1 cup Earth Balance vegan "butter"
pinch of salt
2 Tbsp soy milk - original unsweetened is best here
1 tsp vanilla

Apparently you can just put all of the ingredients into the food processor and mix, but instead of getting another piece of equipment dirty, we decided to use the stand mixer that was already out. 

Melt the chocolate and then let it cool.  (We stuck it in the fridge for a few minutes and kept checking it so it didn't harden back up.)  Cream the "butter" and powdered sugar really well until nice and fluffy.  Then pour in the chocolate and mix, then add the salt, soy milk and vanilla and mix.   Lesson learned, don't add the milk and vanilla to the chocolate first as that will make the chocolate seize up and is much harder to add in.  It still worked out, but would have been easier the first way.

Then frost your cake!  Smitten Kitchen was so right about the small offset spatula - it made spreading the frosting so much easier than I've ever done before. 


Happy Birthday!


Thursday, June 28, 2018

Immigration Basics - How to become a citizen and what services to undocumented immigrants get?

Source: Posted on Facebook and then shared by Andy Colwell on 6/27/18...definitely important information to know to be informed when making arguments.

Eric Pavri
I'm an immigration lawyer. I know that many of my Facebook friends, who are good and intelligent people, honestly have questions like the following: Why don't all these immigrants just become legal, and do they get all kinds of public benefits?
I hope you'll read what I wrote here in the spirit in which it was intended, which is to cut through the BS (from poorly-informed but loud voices on both the left and right) and simply provide correct information so that people can decide for themselves what is right and best.
I recently wrote the comment below to a Facebook story from a local news channel, about a teacher here in Colorado Springs who has DACA.
********************************************************
To several of the commenters on this thread – first, I want to acknowledge that asking why people don’t just become citizens, or whether people without legal status can get public benefits that U.S citizens cannot, are legitimate questions. If they are asked in good faith, no one should mind you asking them.
Therefore, let me answer your questions. Please know that I am well-informed on these topics, as an immigration lawyer for the past 8 years, the past six of those in Colorado, and currently the Director of Family Immigration Services at Catholic Charities of Central Colorado (most of you know us best as the organization that runs the Marian House soup kitchen). You may verify those statements by entering my bar number (44591) on the Supreme Court of Colorado website (http://www.coloradosupremecourt.com/Search/AttSearch.asp) or viewing our Catholic Charities website (https://www.ccharitiescc.org/).
First, as to why young people who have DACA haven’t just become citizens:
To become a U.S. citizen (other than by birth), one must first become a Lawful Permanent Resident (“green card” holder). Only after five years as a Permanent Resident can you apply to become a citizen. Thus, the obvious next question: how does a person become a Permanent Resident? There are three primary options to do so:
1) Family-based petitions. This means that a U.S. citizen or Permanent Resident parent, spouse, adult child, or sibling files a “petition” for you. Depending on the category that you fall into, the wait will be anywhere from 1 – 22 years (yep) before you can use that petition to take the next step – applying to become a Permanent Resident (background checks, medical exam, more fees, etc.). That works for people living outside the U.S., but for those who have been here, it may not be possible if they entered the U.S. illegally, even if they were minor children when they did so.
2) Employment-based petitions. A U.S. employer can similarly sponsor you, but generally only if you are in a profession requiring an advanced degree or unique skills (doctors, software engineers, world-class athletes to coach professional sports teams, etc.). Even then, the potential employer must generally also prove that they made good-faith efforts to hire a U.S. citizen for the position, but no qualified applicants applied.
3) Diversity visa lottery. Every year, the U.S. government selects 50,000 people worldwide who enter a lottery and pass background checks to come to the U.S. as Permanent Residents. This lottery, however, is only available to people from countries that traditionally send few people to the US – so, for example, people from countries such as Mexico, the Philippines, China, Guatemala, India, El Salvador, and other countries that send larger numbers of immigrants to the U.S. do not have this option.
Extra note: The current Administration has actively sought to eliminate or dramatically limit Options #1 and #3. The new term being used in the attempted re-branding of Option #1, family-based immigration, which has been the basic principle of U.S. immigration law for over a century, is “chain migration”. If those two options are in fact eliminated or curtailed, legal immigration to the U.S. will be significantly reduced.
The KEY POINT to all of the above: If you do not qualify for one of these 3 options, then there is no “line” to get into to legally become a Permanent Resident and eventually a U.S. citizen. So, if you are not fortunate enough to have, say, a U.S. citizen spouse or a graduate degree in computer science, you very likely can never become a citizen of the United States.
Second, one commenter above asked why President Obama, when he established DACA in 2012, did not just create a path to citizenship for these young people at that time. The answer: earlier that year, Congress had for the 11th year in a row failed to pass the Dream Act, which would have done exactly that. The President acting through his authority as head of the Executive Branch cannot create a path to Lawful Permanent Residency (and eventual US citizenship). Only a law, passed by Congress and then signed by the President, can accomplish that. So President Obama on June 15, 2012 created the more limited DACA program through Executive Action – which is why President Trump, as the new President, was able to end the program, also without an act of Congress, last fall.
Finally, as to the question of immigrants receiving public benefits, only a U.S. citizen or a Lawful Permanent Resident (green card holder) can receive almost all types of public benefit – including Medicaid, Medicare, SSI disability, Social Security payments for seniors, TANF, and food stamps. The irony: most undocumented immigrants work under made-up Social Security numbers and so receive a paycheck from which Social Security, federal income taxes, and state income taxes are withheld, and of course they pay the same local sales and property taxes as anyone else through retail purchases, pass-through costs of apartment leases, etc. Same of course goes for the 800,000 current DACA recipients, who are authorized to legally work in the U.S. But none of those employees, despite paying IN to the system, will ever receive those public benefits listed above, that are paid for by the money withheld from their paychecks. So they are propping up our federal and state government entitlement programs because they pay in but won’t ever take out.
The following are the public benefits that undocumented immigrants can receive in United States:
1) Public education for children in grades K-12. This was definitively established by a 1982 Supreme Court case, Plyler v. Doe. The Supreme Court in its reasoning explicitly stated that it would not serve the overall public good of the U.S. to leave many thousands of children uneducated.
2) Emergency room services, but only to the point where the patient is considered “medically stable”, at which point he/she is released. These services are not free, however, as in my job I meet hundreds of immigrant families who sacrifice over years to slowly pay off high emergency room medical bills.
3) WIC assistance. This is for milk, food, etc, and available only to pregnant mothers. The rationale is that the children in the womb will be U.S. citizens when born, and therefore it is in the long-term economic best interests of the nation to ensure that they receive adequate prenatal nutrition to improve their chances of being productive citizens in the decades to come.
4) Assistance from police if they are the victim of a crime and call for help. To their credit, the vast majority of our Colorado Springs law enforcement officers take their duty to protect all people seriously. Chief Carey of the CSPD and Sheriff Elder of the EPCSO have made clear that their officers can’t do their most important job – keeping us safe by getting dangerous criminals off our streets – if a whole class of people (undocumented immigrants) is afraid to call 911 to report crimes that they witness or are victim to.
5) Assistance from a fire department. Rationale, besides the obvious moral one: If your house was next to that of an undocumented immigrant family, would you want the firefighters to let that house continue to burn, putting yours at risk of catching on fire too?
And that’s it. Those, to the best of my knowledge, are the only public benefits that an undocumented immigrant can receive in just about any part of the United States. As someone who directs a small office that works with hundreds of low-income immigrant families per year, know that when I see the precarious economic situation of many of these families, I'd help them access other benefits if they could. But they simply can't. Now, children of undocumented parents, born in the U.S., are U.S. citizens under the 14th Amendment (the one that declares that all human beings born on U.S. soil are citizens – this was passed immediately after the Civil War to forever end the legal argument that African Americans were not U.S. citizens). As such, those children can qualify for the same public benefits as any other U.S. citizen, if they qualify through economic need or disability. But their parents or undocumented siblings cannot.
I hope that this information has been useful to those willing to read through this long (for Facebook anyway) explanation. Please know that even this long summary leaves out a ton of detail -- there are tens of thousands of pages of statutes, regulations, internal federal agency procedures, and court decisions guiding how all of this is interpreted and implemented. But please take my word that I honestly believe that no detail I omitted for conciseness changes the basic points above. And I'd be happy to answer questions if you have them. Like I said, I don’t mind honest questions, and I believe that legitimate questions asked in good faith deserve well-informed, accurate answers. If all of us in the U.S. would be willing to actually listen to each others’ sincere concerns and do our best to answer each others’ questions, instead of just yelling at each other or retreating to our corners of the internet (left OR right) where everyone already agrees with us – well, I think we’d move our nation forward a lot more effectively.

To learn more about the asylum process: https://www.uscis.gov/humanitarian/refugees-asylum/asylum

Tuesday, June 19, 2018

Summer DIY Plans

With the summer off from school (besides all the relaxing, reading, PD and planning I want to get done) we have several things that I want to do around the house.  Here's the list to help keep us (mainly me) accountable:


  • Fix the screen porch door - done! It didn't close fully as the door was installed level but the porch isn't level, and it had this crappy spring as a closer so I installed a proper slow closing hinge
  • Finish caulking the edges of the screened in porch, especially where mosquitos can get in
  • Paint the kitchen cabinets a white - the dark cabinets facing north in a galley kitchen that goes all the way to the ceiling is way too claustrophobic for me, exact white TBD
  • Repaint the half bath in semi-gloss - flat paint was the wrong choice, especially around the sink
  • Paint the shutters for the half-bath and then install them
  • Replace some ancient outlets
  • Build a pantry in the kitchen 
We'll see if we end up repainting the master bedroom, the upstairs hall bath (I'll eventually want to redo the brown tile, but that's down the road), and the upstairs guest bedroom.

Then outside we have even more to do, some need (like dealing with the flooding) and some want (tear out those holly bushes that keep sticking me! Terraced raised planter bed, rain garden and permeable patio) - but lots deals on how much we can DIY and what we need to hire out.  

We'll see what gets done!

House Paint Colors

Posting this more as a record for myself, but here are the current house colors we have.  Only two rooms haven't been painted since we bought it, we'll see how long that lasts.  You can tell I gravitate towards cooler colors.


That Master Bedroom color, SW Tradewind, while I love it on paper, I don't think it's really working in the room.  Granted we have uncoordinated furniture, and it's a north facing room with low ceilings so that makes it tough, but I think we can do better.  Ideas in the works...

Spring Break Painting

School took over and there was zero time to post, so I hope to spend some time this summer updating on what we've done with the house, and also doing some DIY myself.

During spring break in March we painted a large bookshelf white using extra paint from the house trim - SW Extra White in Semi-gloss with a few coats of clear polyurethane that won't yellow.  We did sand the bookshelf first with the Ryobi hand sander we got, but could have spent more time there getting all of the finish off.  We let it dry for a few extra days just so it would harden as much as possible.  So far it's held up pretty well, but one edge has chipped already, I'm betting from a massive textbook that I didn't gently place down.


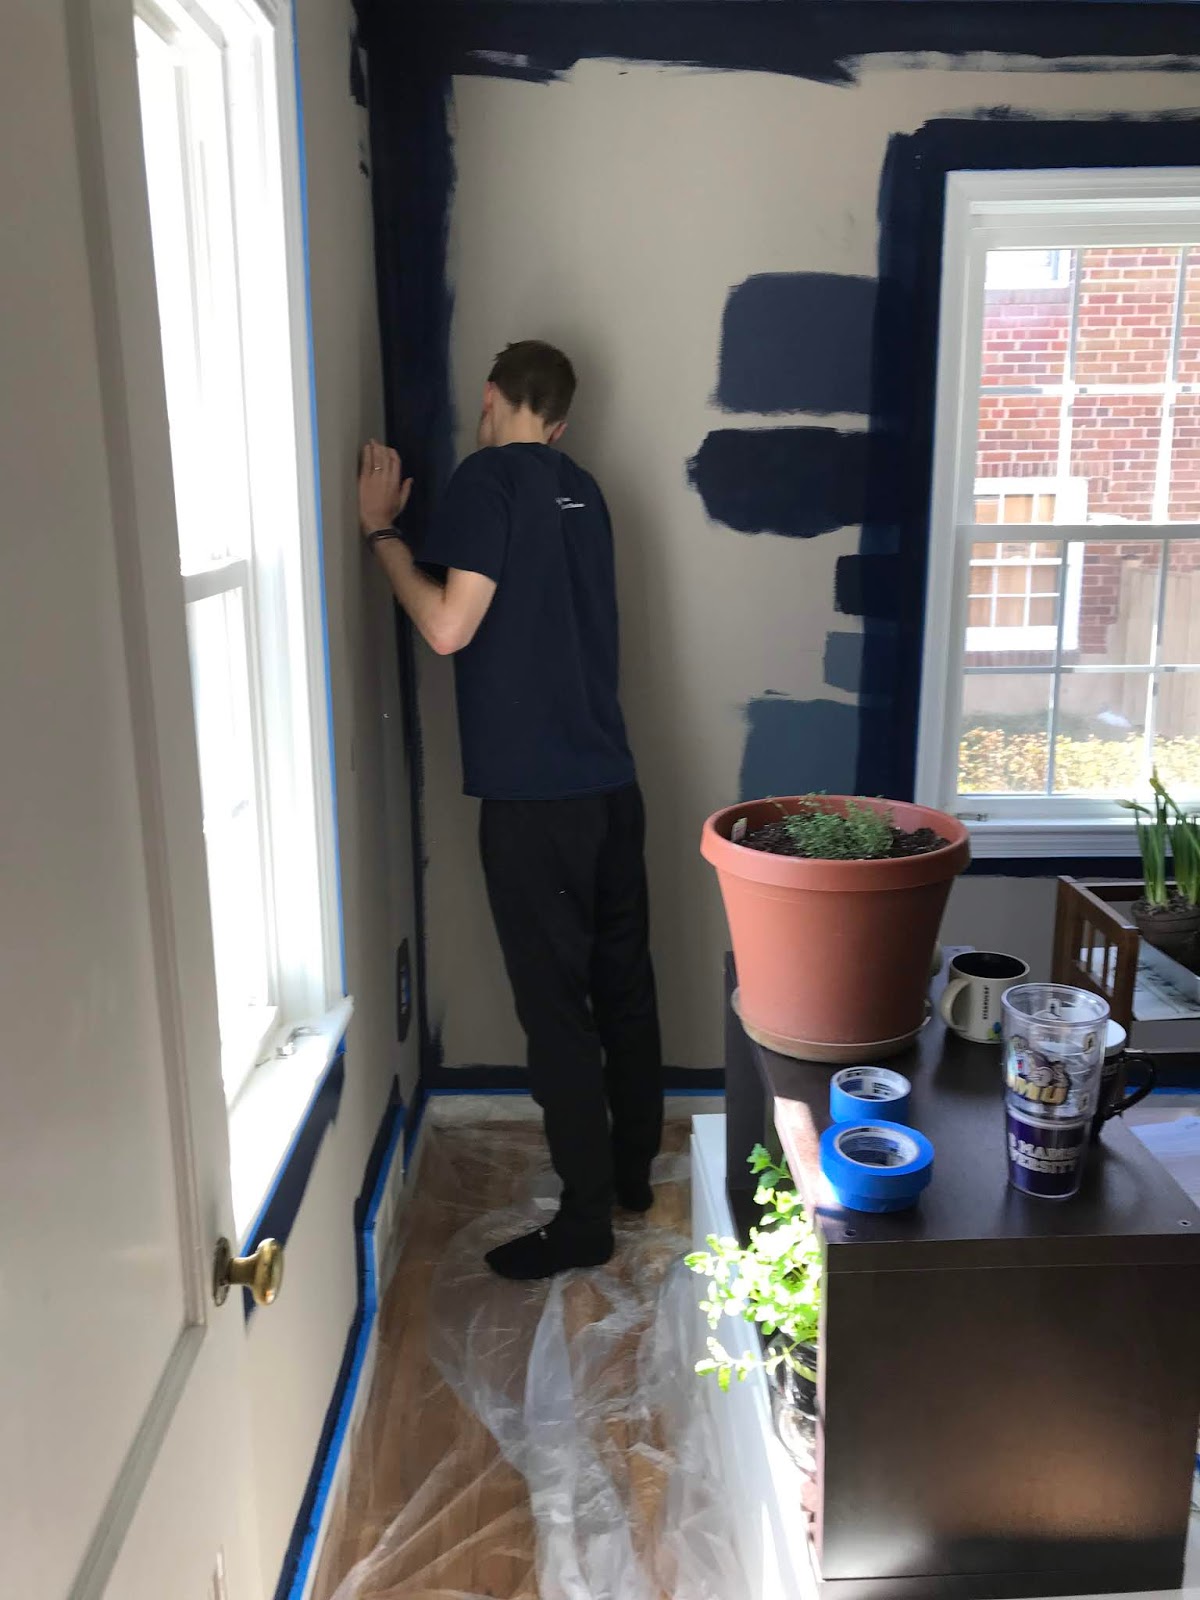
We ended up deciding on SW In The Navy for the office and painted it as well during Spring Break.  It was our first time painting plaster rather than drywall and you definitely need to get the right rollers.  As a south facing room, it gets a ton of light in the morning and afternoon so it doesn't feel as dark as it looks.  Plus the white trim that I gave another quick coat to once we were done, and the white bookshelf definitely helps lighten it too.  It does get dark in the evening, but with a bright desk lamp it feels rather cozy when getting work done.  Eventually we'll get new filing cabinet that match and do some more organizing and getting put together, but it works for now.


First coat done!


Painting finished!  Looks much darker in picture than it does in real life #excusethemess


A little gallery wall developing


Wednesday, March 21, 2018

Office Color Debate

Renovations have finally finished and now it's time to choose some paint for areas of the house we haven't touched yet, like the 3rd bedroom that will be an office.
The listing image

Some samples painted...The choices (evening view) top to bottom: SW Indigo Batik, SW In The Navy, SW Naval, Behr Adirondack Blue, SW Storm Cloud, SW Smoky Blue


With the SW visualizer, we have...
In the Navy

Indigo Batik

Naval

Charcoal Blue
Smoky Blue
Those are a bit hard to compare when scrolling... here's the images together (thank you PowerPoint!) 

Thoughts?

Saturday, January 20, 2018

D-F Vegetarian Pot Pie

A mash-up of 3 different recipes for a dinner party with friends

Bon Appetite's March 1996 Vegetable Pot Pie
Smitten Kitchen's Pancetta, White Bean and Kale Pot Pies
Crust veganized from Smitten Kitchen's Better Chicken Pot Pies

Serves 6-8
Time: ~3 hours

  1. Top (30 mins plus 1 hour chill)
  • 2 cups (250 grams) all- purpose flour
  • 1/2 teaspoon fine sea or table salt
  • 13 tablespoons (185 grams or 6 1/2 ounces) cold unsalted vegan butter (like Earth Balance), diced
  • 6 tablespoons (90 grams) vegan sour cream or vegan Greek-style yogurt
  • 1 tablespoon (15 ml) cider vinegar
  • 1/4 cup (60 ml) very cold water
  • 1 egg, beaten with 1 teaspoon water, for egg wash
Make pastry lids: In a large, wide bowl (preferably one that you can get your hands into), combine the flour and salt. Add the vegan butter and, using a pastry blender or your fingertips, cut them up and into the flour mixture until it resembles little pebbles. Keep breaking up the bits of butter until the texture is closer to uncooked couscous. In a small dish, whisk together the vegan sour cream, vinegar, and water, and combine it with the vegan butter-flour mixture. Using a flexible spatula, stir the wet and the dry together until a craggy dough forms. If needed, get your hands into the bowl to knead it a few times into one big ball. Pat it into a flattish ball, wrap it in plastic wrap, and chill it in the fridge for 1 hour or up to 2 days.  Then make filling.

Filling (30 mins prep + 1 hour bake)
  • 15 pearl onions, or 2 medium onions cut in 1/2 inch pieces
  • 2 large carrots cut in 1/2 inch pieces
  • 2 celery stalks, finely chopped
  • 2 russet potatoes (about 8 ounces each), peeled, cut in 1/2 inch pieces
  • 2 rutabagas (about 6 ounces each), peeled, cut in 1/2 inch pieces
  • 1 red bell pepper, seeded, cut in 1/2 inch pieces
  • 1 leek (white and pale green parts only), chopped
  • 10 ounces mushrooms, coarsely chopped
  • Thinly sliced Swiss chard leaves from an 8- to 10-ounce (225- to 285-gram)
    bundle (4 cups); if leaves are very wide, you can halve them lengthwise
  • 2 tablespoons olive oil
  • 3 teaspoons dried herbs de Provence
  • 1 cup frozen peas, thawed
  • 2 cups white beans, cooked and drained, or from one and a third 15.5- ounce
    (440-gram) cans
  • 1 cup canned vegetable broth
  • 1 cup dry red wine
  • 1-1/2 tablespoon cornstarch
  1. Preheat oven to 425°F. Blanch pearl onions in large pot of boiling water 2 minutes. Drain onions and cool. Peel onions.
  2. Cut carrots, potatoes, rutabagas and bell pepper into 1/2-inch pieces. Place in heavy large baking pan with onions, leek and mushrooms. Add olive oil and herbes de Provence and toss to coat. Roast until vegetables are tender, stirring occasionally, about 1 hour. Transfer vegetables to 8-inch square glass baking dish. Saute celery until soft, then add swiss chard for 2 minutes, and add in to baking dish. Stir in peas and white beans. Season vegetables to taste with salt and pepper. (Can be prepared 1 day ahead. Cover tightly and refrigerate.)
  3. Reduce oven temperature to 350°F. Mix 1 cup vegetable broth and 3/4 cup dry red wine in heavy small saucepan over medium heat. Bring to simmer. Stir remaining 1/4 cup red wine and 1-1/2 tablespoon cornstarch in small bowl until smooth. Add to broth mixture and simmer until sauce thickens slightly, stirring occasionally, about 4 minutes. Pour sauce over baking dish.
    1. Roll out the dough so that it will cover the baking dish.  Brush edges of baking dish with egg wash, place top over baking dish and press down to adhere to the outer edges.  Brush the top with egg wash, then cut decorative vents to let steam escape.  Bake on top of a baking sheet to catch spills until crust is bronzed and filling is bubbling, 35-40 minutes.
    1. Spoon pot pie onto plate; serve hot.
    2. Enjoy with friends!

Thursday, December 21, 2017

DF Gingerbread Brownies

DF Gingerbread Brownies
(adapted from Epicurious)


INGREDIENTS
  • Nonstick vegetable oil spray
  • 2 cups sugar
  • 1 1/2 cups unsweetened cocoa powder
  • 1 teaspoon kosher salt
  • 1 cup (2 sticks) unsalted EarthBalance "butter"
  • 4 large eggs
  • 3 tablespoons molasses (not robust/blackstrap)
  • 2 teaspoons vanilla extract
  • 1 cup all-purpose flour
  • 2 teaspoons ground cinnamon
  • 2 teaspoons ground ginger
  • 1 teaspoon baking powder
  • 1/2 teaspoon ground cloves
  1. Place a rack in center of oven; preheat to 350°F. Coat a 9x9" (or 9x13" for thinner brownies) baking pan with nonstick spray. Line pan with 2 overlapping layers of parchment, leaving a 2" overhang on all sides. Coat parchment with nonstick spray. 
  2. Whisk 2 cups sugar, 1.5 cups cocoa powder, and 1 tsp salt in a large bowl. 
  3. In a small bowl, mix together 1 cup flour, 2 tsp cinnamon, 2 tsp ginger, 1 tsp baking powder, and 1/2 tsp cloves.  (Heap those spices!)
  4. Melt 1 cup (2 sticks) butter in a medium heatproof bowl in the microwave or in a medium pot over medium heat. Immediately add hot butter to sugar mixture and stir with a wooden spoon or rubber spatula until smooth. 
  5. Add 4 eggs one at a time, stirring vigorously with spoon or spatula after each addition, until batter is thick, shiny, and smooth. Stir in 3 T molasses and 2 tsp vanilla.  (I got about 2.5 T molasses before it ran out, close enough.)
  6. Using a sifter or fine-mesh sieve, sift in the flour-cinnamon-ginger-baking powder-cloves mixture. 
  7. Stir until well incorporated, then beat vigorously for 40 strokes.
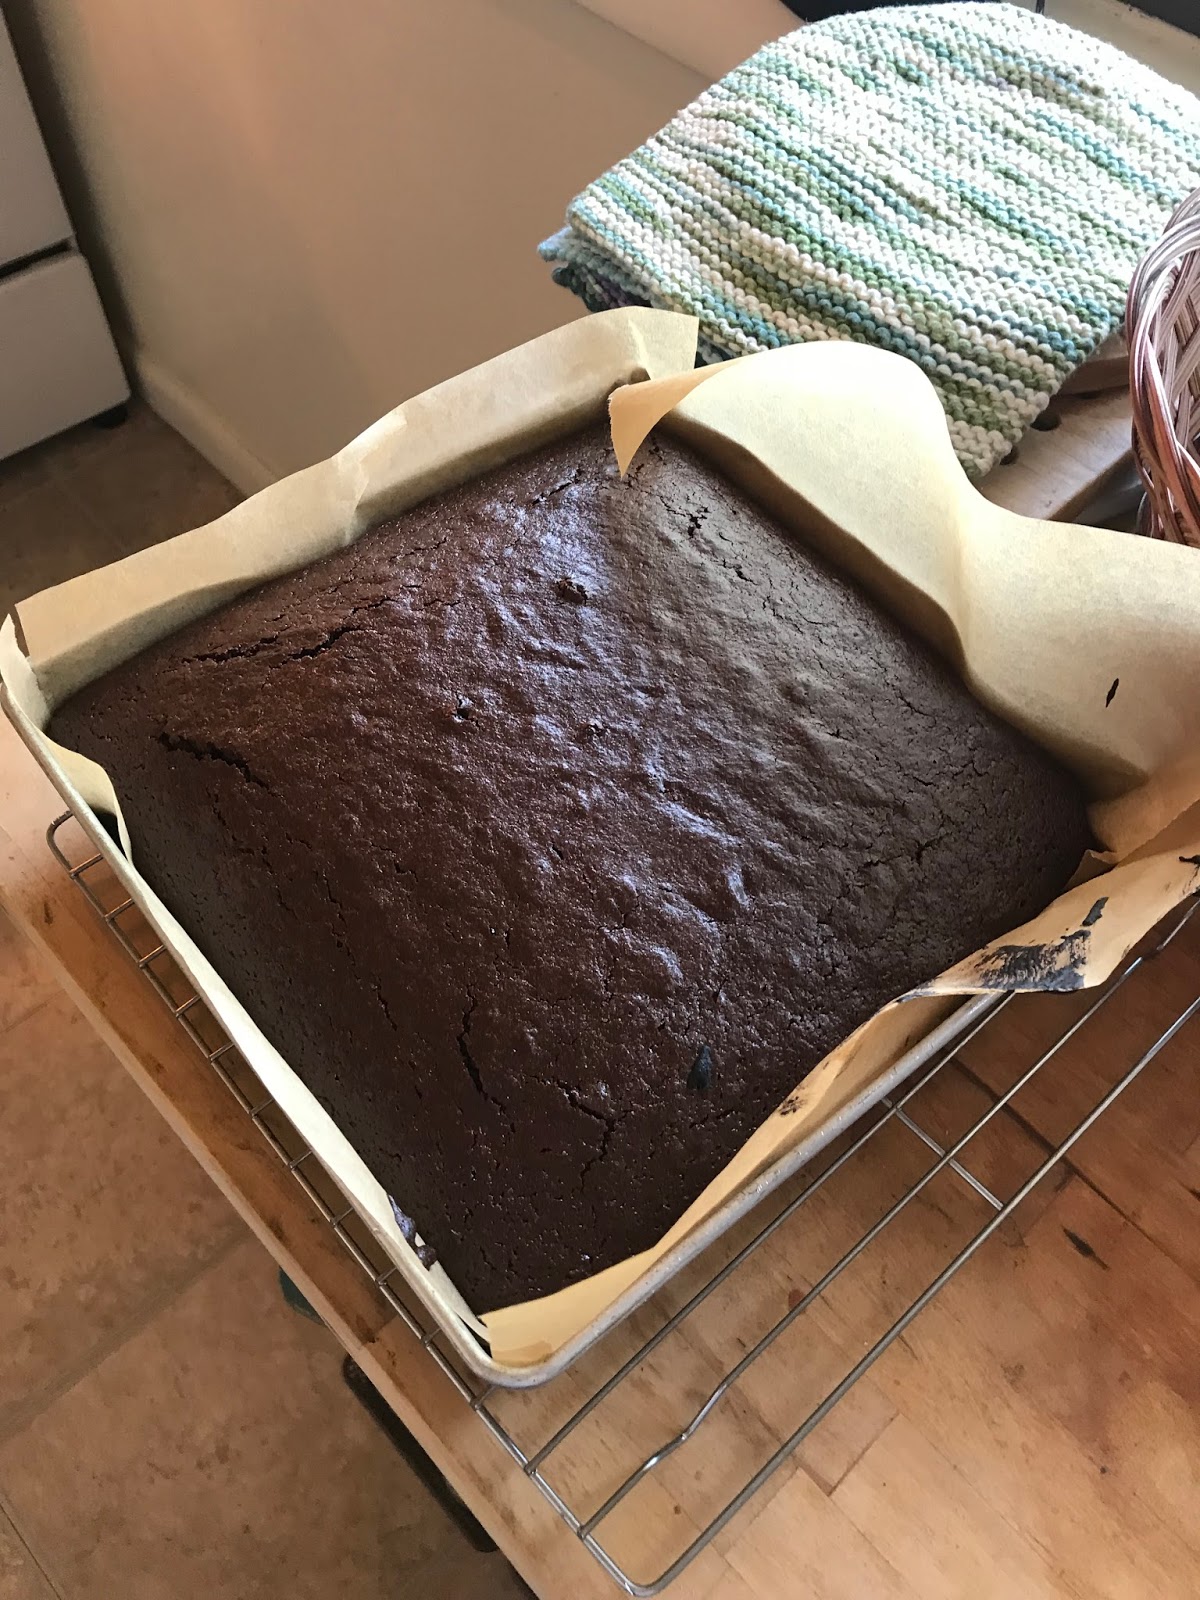
  8. Transfer batter to prepared pan; smooth top. Bake brownie until top is firm to the touch, edges are set, center is moist but not uncooked, and a tester or paring knife inserted into the center comes out with moist crumbs (not runny batter) attached, about 20 minutes.  *Note: It took about 40 minutes to bake in my oven (gas) probably because they're so thick.  Next time I'll use a 9x13 pan so that they're thinner and bake faster.
  9. Transfer to a wire rack and let brownie cool completely in pan. Using parchment overhang, lift brownie out of pan and transfer to a cutting board. Cut into 16 squares.